本文主要介绍使用 GitHub 和 Hexo 搭建个人博客的详细方法步骤,包括安装配置 Hexo、配置个人域名、编写并发布博客的详细步骤,最后介绍 Next 主题及设置,最终效果:
Erik-ly
http://www.erik-ly.com/
Hexo 简介
Hexo 官网:https://hexo.io/zh-cn/
Hexo 文档:https://hexo.io/zh-cn/docs/
Hexo 视频教程
YouTube:https://www.youtube.com/playlist?list=PLD5dyQmlN6xPqBV0cxO7zAe1C8OmDPqfX
Bilibili:https://space.bilibili.com/362224537/channel/detail?cid=61636
安装 Hexo
首先,本地需要有node.js和git,我的软件版本为:

然后安装Hexo
1 | npm install -g hexo-cli |

创建博客
初始化项目
首先创建一个文件夹,用于存放博客项目,我的博客项目文件夹名为erik-ly-blog,因此
1 | hexo init erik-ly-blog |

创建完项目后可以切换到目录并查看目录结构

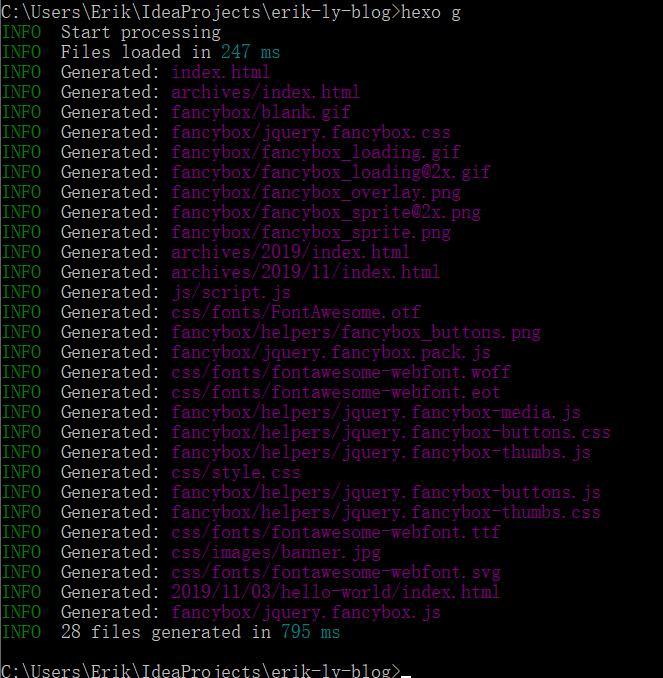
生成静态文件
因为初始化项目后,项目中已经包含了一篇hello world的博客,所以先看下效果,可以使用以下命令生成静态文件
1 | hexo g |
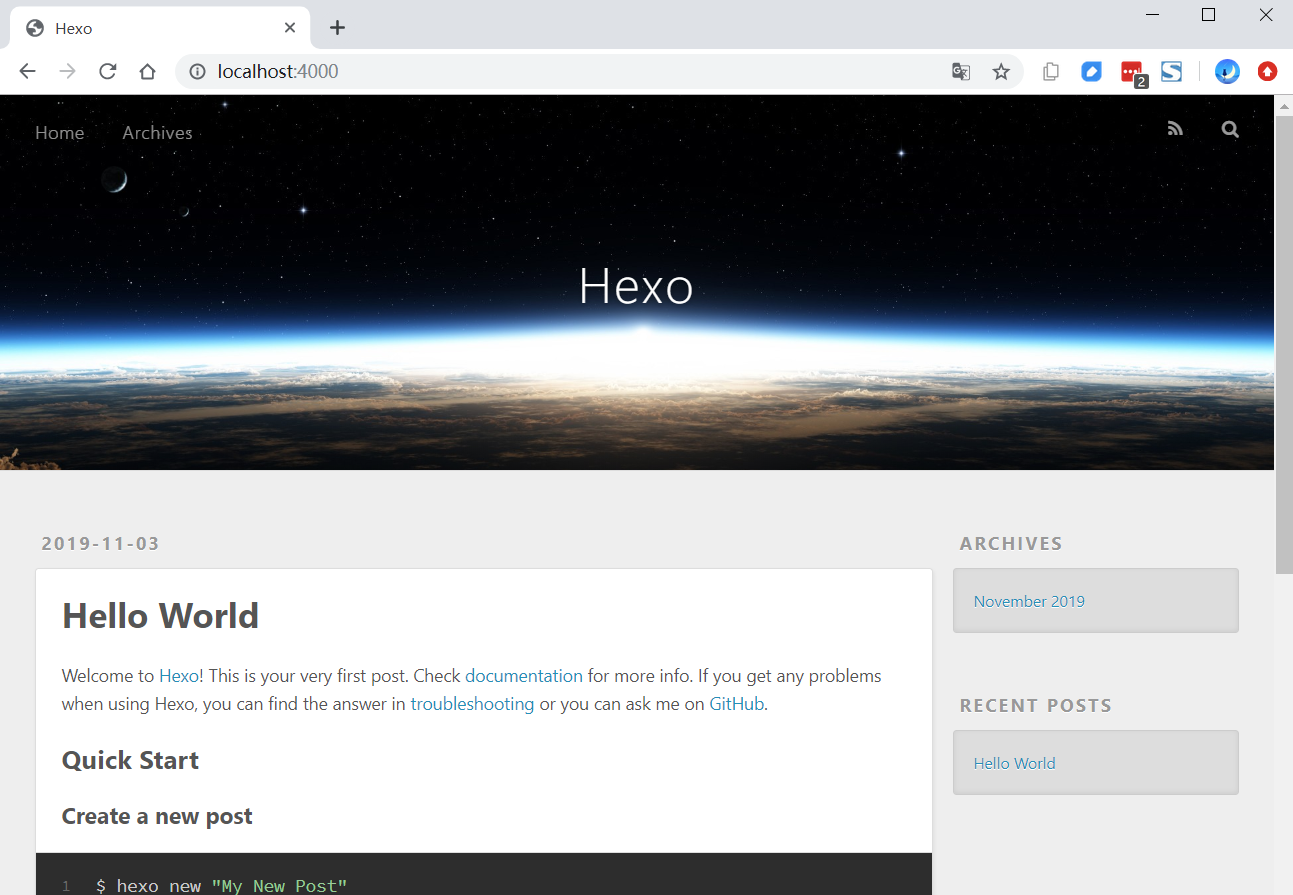
本地部署
使用以下命令进行本地部署,查看效果
1 | hexo s |

然后打开网页 http://localhost:4000/ ,显示效果为:
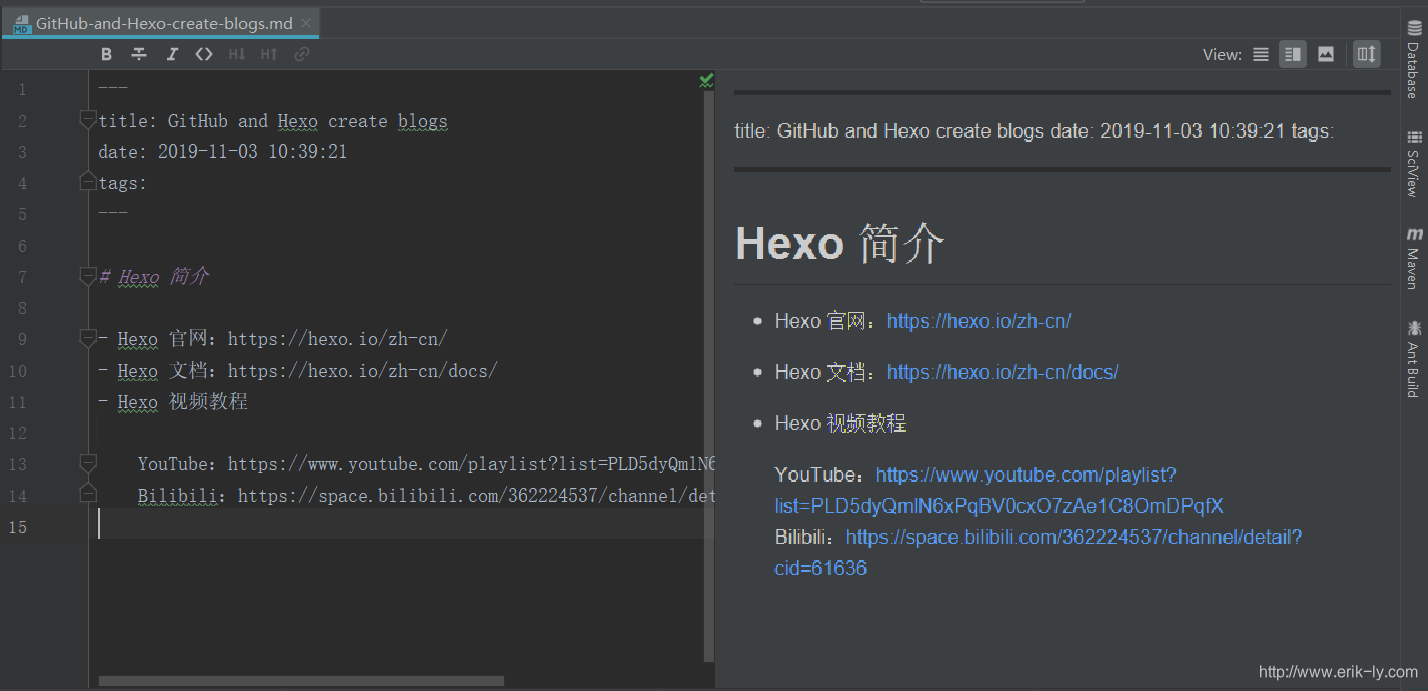
写作
现在开始写第一篇文章,我这里为了方便使用,暂时使用 IDEA 打开项目并编辑文章,准备写第一篇文章,可以使用如下命令:
1 | hexo new "GitHub and Hexo create blogs" |

然后使用 Markdown 语法编辑文章
编辑好后依次执行如下命令
1 | hexo g |
查看网页显示效果

配置
现在对博客进行一些简单的设置,打开设置文件_config.yml,然后依据自己情况进行设置
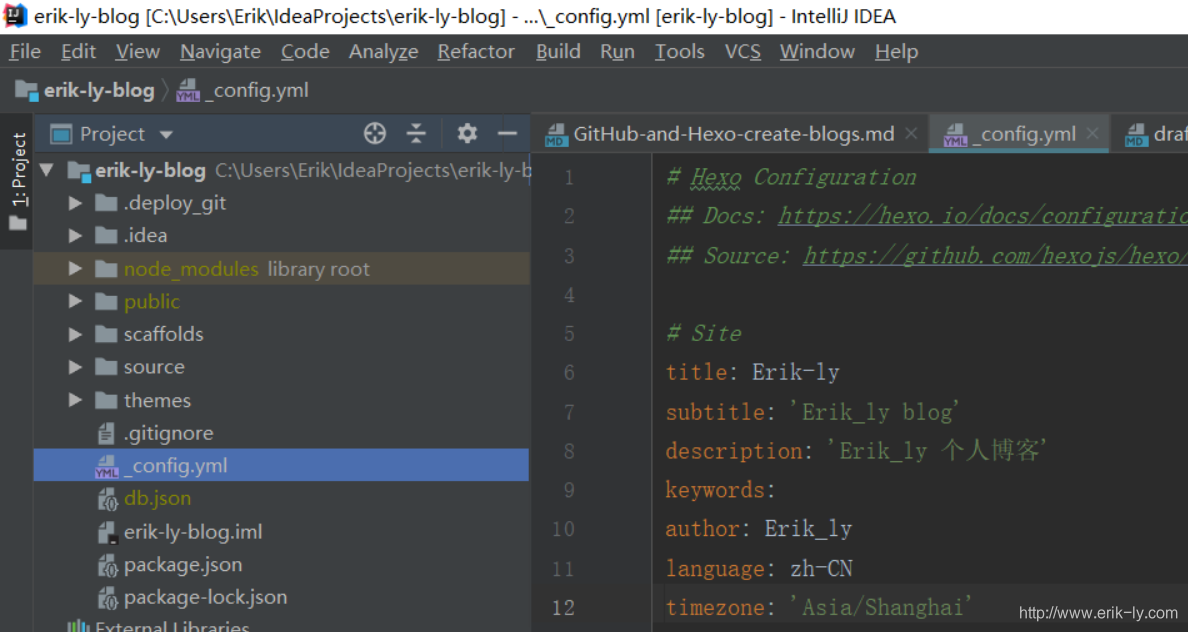
更多配置参数说明可以查看:https://hexo.io/zh-cn/docs/configuration
修改好后可以使用hexo g和hexo s命令查看效果
部署
创建 GitHub 仓库
在 GitHub 上创建一个用户名.github.io的仓库,这个是固定写法,比如我的 GitHub 用户名为Erik-ly,那么我就要新建一个名为Erik-ly.github.io的仓库。

安装 Hexo 插件
安装插件
1 | npm install hexo-deployer-git --save |
然后配置_config.yml,
1 | # Deployment |
部署
使用下面命令部署到 GitHub 上
1 | hexo d |
部署完成后,打开 https://erik-ly.github.io/ 查看效果,这个是和你自己的仓库名称一致的,网页效果为

绑定域名
查看仓库 IP
如果想要一个自己的域名,可以在阿里云或腾讯云上购买域名,这里以阿里云为例示范域名解析过程。
首先使用ping查看自己 GitHub 上用户名.github.io的 IP 地址,

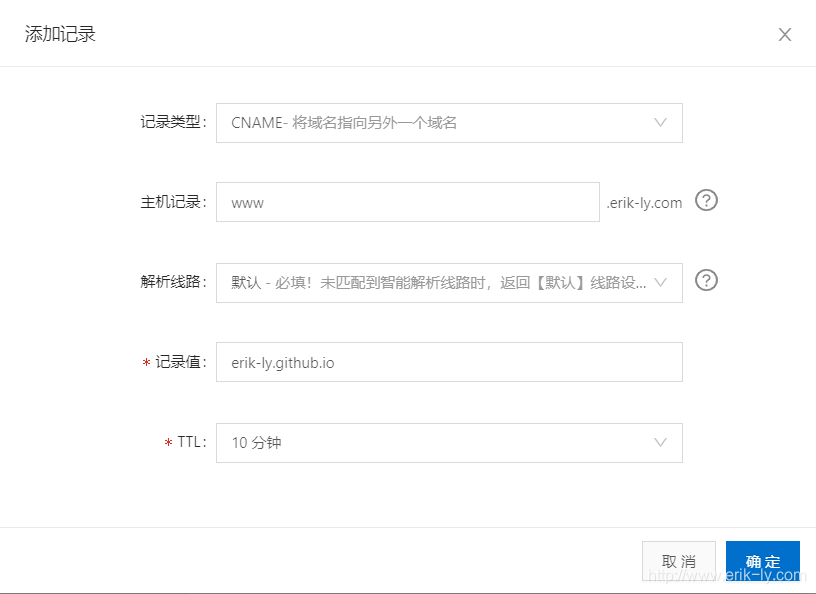
设置域名解析
然后在阿里云上进行域名解析


分别添加如下两条记录

查看域名解析效果

配置 CNAME
在 Hexo 文件夹的source目录下创建一个名为CNAME的文件,然后输入你的域名

部署
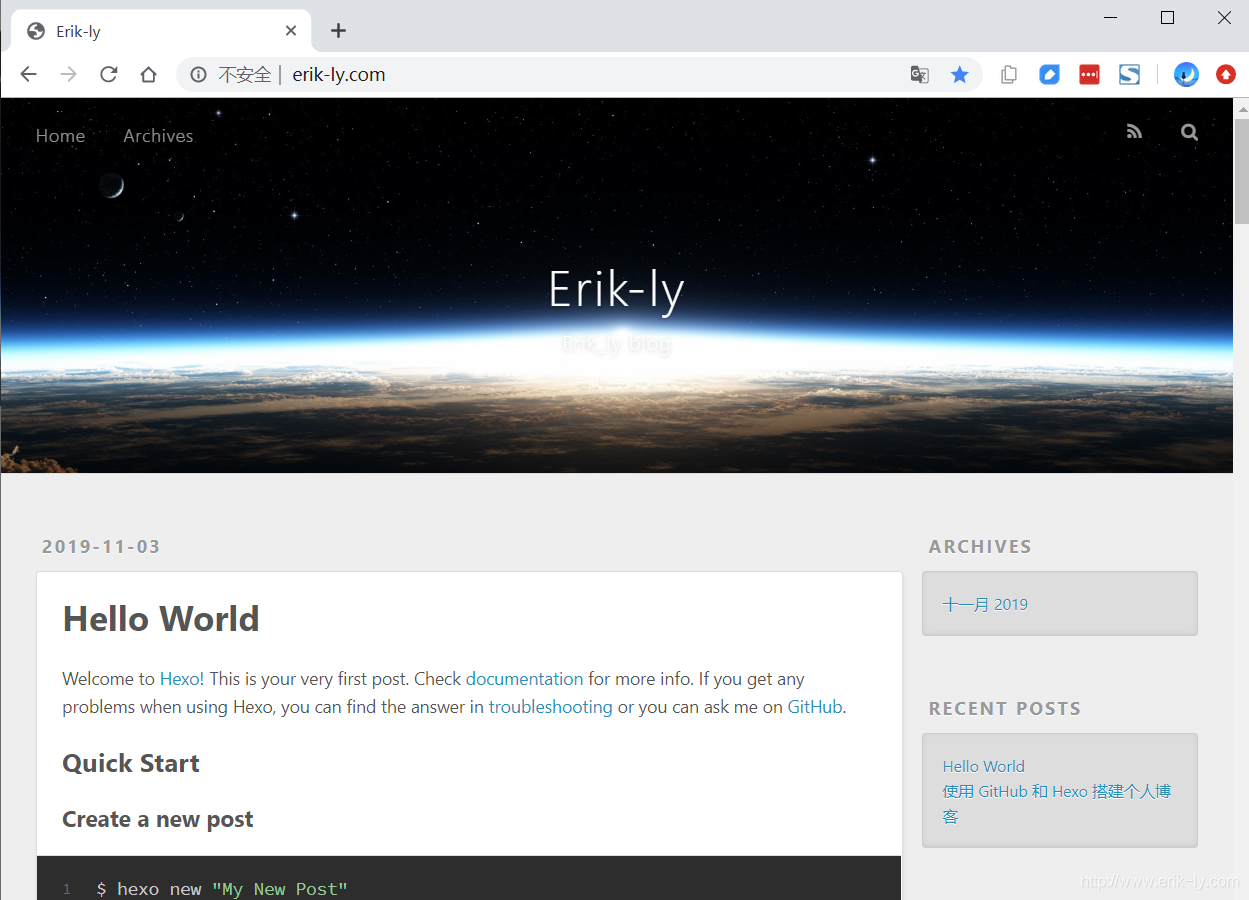
使用hexo d部署,然后访问网页查看效果,我这里是 http://www.erik-ly.com/
Next 主题及设置
更换主题
这里选择的是 Next主题 ,简洁方便,更换主题步骤为:
由于我在 Windows 系统中编辑的博客,无法使用官方的命令安装,因此我直接下载的 Next V7.5.0 版本的源码,放到themes目录中,在配置文件_config.yml中配置如下:
1 | # Extensions |
设置布局
在 themes\next\_config.yml 的配置文件中设置 Next 主题的布局,有四种布局,可以分别尝试下,这里选择的是“Pisces”。
设置左边栏
Next 主题的详细设置可以参考 Next官方设置 。
我这里主要根据自己的需要对左侧边栏内容进行设置,最终效果为: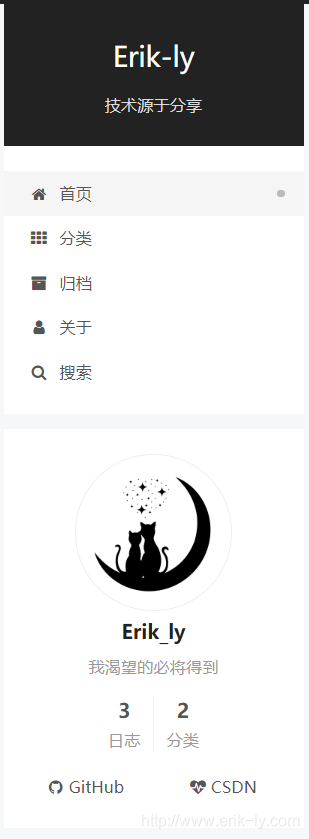
首先在\themes\next\_config.yml中设置如下:
1 | menu: |
设置分类
新建分类页面
1 | hexo new page categories |
在 source\categories\index.md 中设置
title: 分类
date: 2019-11-09 09:50:39
type: “categories”
以后在文章开头设置分类,如这篇文章为:
1 | --- |
设置标签
新建标签页面
1 | hexo new page tags |
在 source\tags\index.md 中设置
1 | --- |
之后在文章开头设置 tags ,如:
1 | --- |
如果需要设置多个标签可以使用tats:[标签1,标签2,标签3],如
1 | tags: [Hexo,GitHub] |
设置关于
“关于”页面与“分类”差相似,都需要新建页面,
1 | hexo new page about |
然后在 \source\about\index.md 中写“关于”页面的内容。
设置搜索
搜索使用的是 Next 自带的搜索工具 hexo-generator-searchdb ,首先下载安装
1 | npm install hexo-generator-searchdb |
然后在\themes\next\_config.yml中设置如下:
1 | # Local Search |
设置访问量
在\themes\next\_config.yml中设置如下:
1 | busuanzi_count: |
设置头像
将头像图片放到 images 文件夹中,然后在\themes\next\_config.yml中设置如下:
1 | # Sidebar Avatar |
设置社交
在\themes\next\_config.yml中设置如下:
1 | social: |
“||”后面的名称是图标名,图标可以去 Font Awesome Icon 网站上找,填写相应的名字即可。
设置 Logo
网站 logo 默认是 “N”,可以自定义,可以将自己的图片放到 images 中,然后在\themes\next\_config.yml中设置如下:
1 | favicon: |
至此,个人博客网站搭建设置完毕,后续增加相应的文章即可。
欢迎访问我的个人博客网站:http://www.erik-ly.com/
参考资料
文档 | Hexo
https://hexo.io/zh-cn/docs/Hexo教程 - YouTube
https://www.youtube.com/watch?v=PsXWbI2Mqu0&list=PLD5dyQmlN6xPqBV0cxO7zAe1C8OmDPqfX&index=7GitHub+Hexo 搭建个人网站详细教程 - 知乎
https://zhuanlan.zhihu.com/p/26625249Hexo-NexT配置超炫网页效果 - 简书
https://www.jianshu.com/p/9f0e90cc32c2